Level Editors 2D
Data-driven Strategy / AAA Level Design Pipeline
-
Create world in Blender/Houdini
-
Export objects as JSON
-
"Convert JSON → Binary (.lvl, .dat)"
-
Load the world directly into the game
-
Ex :
-
Bethesda
-
Elder Scrolls uses JSON/XML for NPC and quest metadata.
-
-
Ubisoft
-
JSON in level design tools.
-
-
CD Projekt RED
-
Uses CSV for balancing in The Witcher 3.
-
-
Rockstar Games
-
Open worlds like GTA and Red Dead Redemption.
-
Also uses the proprietary
.RPFformat (used in GTA and RDR).
-
-
id Software
-
Doom Eternal loads maps in binary.
-
-
Crytek
-
Uses the proprietary
.CRYformat (CryEngine format).
-
-
id Tech
-
Uses the proprietary
.BSPformat (used in Quake, Doom).
-
-
LDtk (Level Designer tool kit)
-
LDtk .
~Tiled
Impressions
-
It’s nice how simple it is and how simple the exported data is.
-
The tile rules system is interesting.
-
The Objects system is quite nice.
-
Tho, it has an ultra bad interface, extremely confusing.
-
"It’s just objects scattered on a table".
-
I don’t know, it’s unpleasant, outdated, and will never be updated.
-
-
Its filesystem system is quite confusing.
-
THO
-
It has the feature to edit isometric and hexagonal maps, which is very welcome.
-
About
Creation
Projects
-
Projects .
-
It’s possible to add Custom Properties to Projects.
-
-
Only works if there’s an open Project.
-
Worlds
-
Worlds .
-
The Pattern Matching section is quite interesting.
-
-
From what I understood, it’s just a way to bundle Maps together.
-
It can be defined later, no problem.
Maps
-
Where you draw.
Basics
Examples
-
In the folder
C:\Program Files\Tiled\examplesthere are some examples showing basically all of the app’s tools. -
Comments :
-
\examples\orthogonal-outside.tmx-
Use of orthogonal Tile Layers, with simple Object Layers, and Terrain Sets.
-
-
\examples\isometric_grass_and_water.tmx-
Use of isometric Tile Layers.
-
-
\examples\hexagonal-mini.tmx-
Use of hexagonal Tile Layers.
-
-
\examples\perspective_walls.tmx-
Use of Tile Layers, with a Tibia-style visual.
-
Useful to understand the use of offset in tileset properties.
-
-
\examples\sticker-knight\map\sandbox.tmx-
Created the entire world with Object Layers, without using Tile Layers.
-
-
\examples\desert.tmx-
Use of Terrains Sets.
-
-
\examples\sewer_automap\sewers.tmx-
Use of Automapping rules.
-
-
Layers
-
Tile Layer :
-
Although not as flexible as Object Layers, they provide efficient data storage and good rendering performance as well as efficient content creation.
-
Features:
-
Name.
-
Class.
-
Parallax.
-
Offset.
-
Modulation of all tiles.
-
-
Uses:
-
Despite only being able to refer to tiles, tile layers can also be useful for defining various bits of non-graphical information in your level.
-
Collision information can often be conveyed using a special tileset, and any kind of object that does not need custom properties and is always aligned to the grid can also be placed on a tile layer.
-
-
-
Object Layer :
-
Brushes:
-
Rectangle
-
Ellipse
-
Point
-
Polygon
-
Polyline
-
Tile
-
For freely placing, scaling and rotating your tile graphics
-
-
Text
-
For custom text or notes (since Tiled 1.0)
-
-
-
Operations:
-
Connecting objects:
-
It can often be useful to connect one object with another, like when a switch should open a certain door or an NPC should follow a certain path. To do this, add a custom property of type
objectto the source object. This property can then be set to the desired target object in several ways.
-
-
-
-
Image Layer :
-
Image layers provide a way to quickly include a single image as foreground or background of your map.
-
They currently have limited functionality and you may consider adding the image as a Tileset instead and place it as a Tile Object.
-
This way, you gain the ability to freely scale and rotate the image.
-
-
Image layers can be repeated along the respective axes through their Repeat X and Repeat Y properties.
-
-
Group Layer :
-
Group layers work like folders and can be used for organizing the layers into a hierarchy. This is mainly useful when your map contains a large amount of layers.
-
The visibility, opacity, offset, lock and tint color of a group layer affects all child layers.
-
Tools
-
Stamp :
-
B
-
While holding
Shift, click any two points to draw a line between them. -
While holding
Ctrl+Shift, click any two points to draw a circle or ellipse centered on the first point. -
Activate the Random Mode using the dice button on the Tool Options toolbar to have the Stamp Brush paint with random tiles from the tile stamp. The probability of each tile depends on how often it occurred on the tile stamp, as well as the probability set on each tile in the Tileset Editor.
-
Activate the Terrain Fill Mode using the Terrain tile terrain button on the toolbar to have the Stamp Brush paint using random terrain tiles. This makes adjacent tiles match edge and corner terrains to be placed.
-
-
Terrain :
-
T
-
The Terrain Brush allows for efficient editing with certain types of terrain transitions (corner-based, edge-based or a combination).
-
You can draw lines by holding
Shift. When holdingCtrl, the size of the edited area is increased to cover an entire tile rather than just one corner or edge. -
When holding
Alt, the editing operations are also applied at a 180 degree rotation. This is especially useful when editing strategic maps where two sides need to have equal opportunities. The modifier works well in combination with eitherShiftfor drawing lines orCtrlfor increasing the edited area.
-
-
Bucket Fill :
-
F
-
The Bucket Fill Tool provides a quick way of filling empty areas or areas covered with the same tiles. The currently active tile stamp will be repeated in the filled area. It can also be used in combination with the Random Mode , or Terrain Fill Mode .
-
When holding
Shift, the tool fills the currently selected area regardless of its contents.
-
-
Shape Fill :
-
P
-
This tool provides a quick way to fill rectangles or ellipses with a certain tile or pattern.
-
Holding
Shiftfills an exact square or circle. -
Holding
Altdraws the rectangle or ellipse centered around the starting location.
-
-
Eraser :
-
E
-
Left clickerases single tiles. -
Right clickcan be used to quickly erase rectangular areas. -
Holding
Shifterases on all layers.
-
-
Selection :
-
Rectangular Select allows selection of rectangular areas.
-
Magic Wand allows selection of connected areas filled with the same tile.
-
Select Same Tile allows selection of same-tiles across the entire layer.
-
Holding
Shiftexpands the current selection with the new area. -
Holding
Ctrlsubtracts the new area from the current selection. -
Holding
CtrlandShiftselects the intersection of the new area with the current selection.
-
Tileset
Features
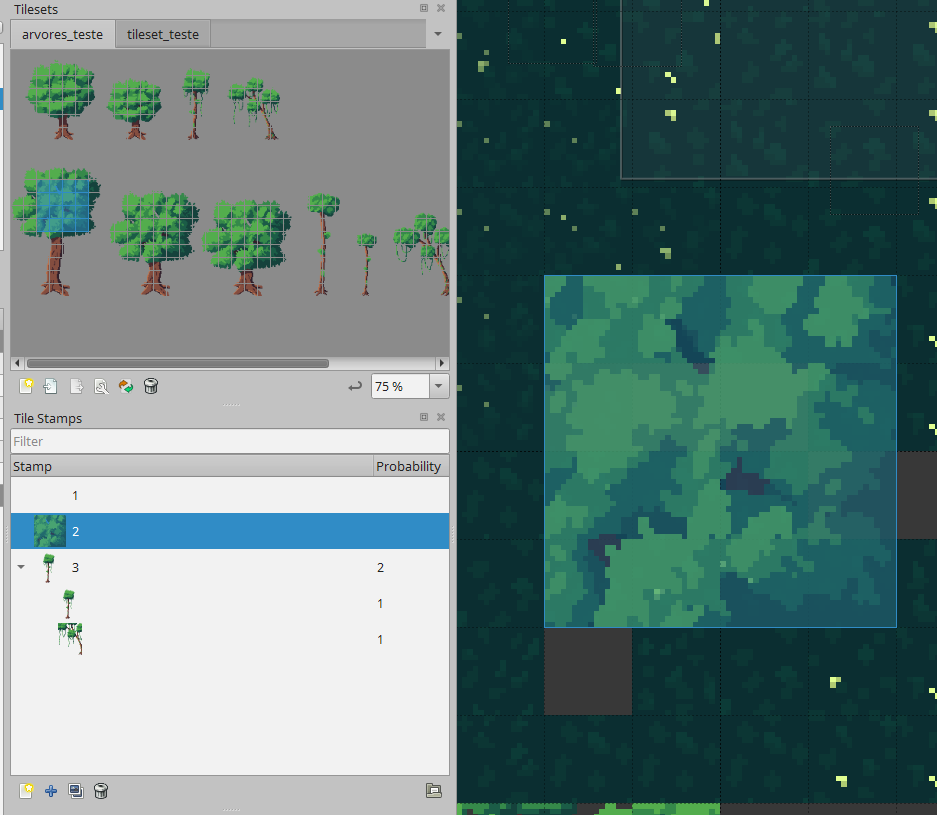
Stamps
-
 .
.
-
It’s a brush creation tool.
-
How to use :
-
Select a region of the tileset.
-
Click on the
Add New Stampbutton in the Stamps tab.
-
-
When to use :
-
Only use as a shortcut to recreate patterns.
-
Don’t use it to “place large divided objects at once”.
-
For example, placing a house divided into several tiles using a Stamp can be problematic.
-
If the game is completely topdown, without characters passing behind tiles, then it’s fine, but if characters can go behind tiles, Stamps are a bad solution, as they interfere with how YSort would be defined.
-
-
-
Data :
-
They are saved exactly as if each tile had been placed manually.
-
That is, this tool is just an editor shortcut, but when exporting, it’s as if it hadn’t been used.
-
This is 100% confirmed.
-
Templates
-
For objects only.
-
It’s not possible to create templates from tiles.
-
Technically it’s possible to place a tile in an object layer via
Insert Tile (T), in the Object Layer tools. From there, you can save this “object-tile” as a template. -
Still, you can’t save Stamps as templates, or something like that.
-
-
Data :
-
When exporting, a reference to the used template is made.
{ "draworder":"topdown", "id":6, "name":"Object Layer 2", "objects":[ { "id":54, "template":"pressure_plate.tx", "x":105, "y":496 }, { "id":55, "template":"pressure_plate.tx", "x":242, "y":497 }], "opacity":1, "type":"objectgroup", "visible":true, "x":0, "y":0 } -
Automapping with Rules
-
Quite a solid system, I think.
-
You must press ~
ctrl + Mor ~alt + Mfor autotiling to occur. -
It’s possible to enable automatic autotiling in the top menus.
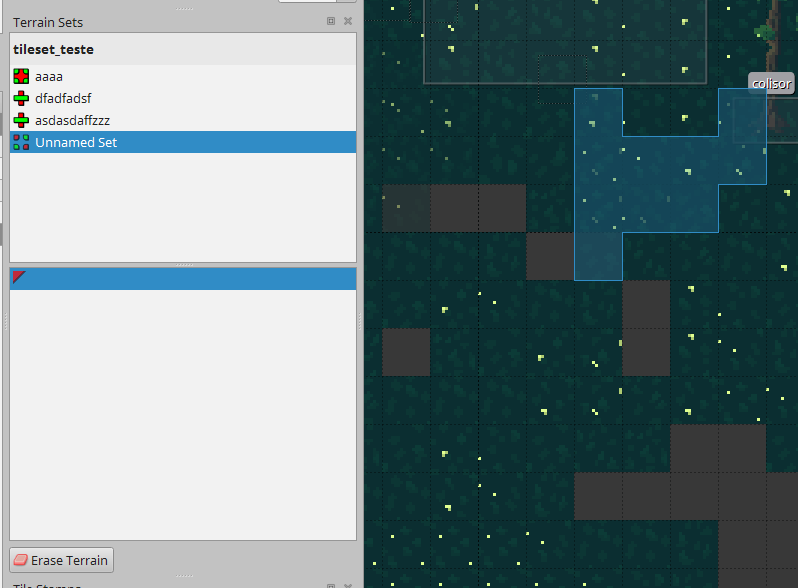
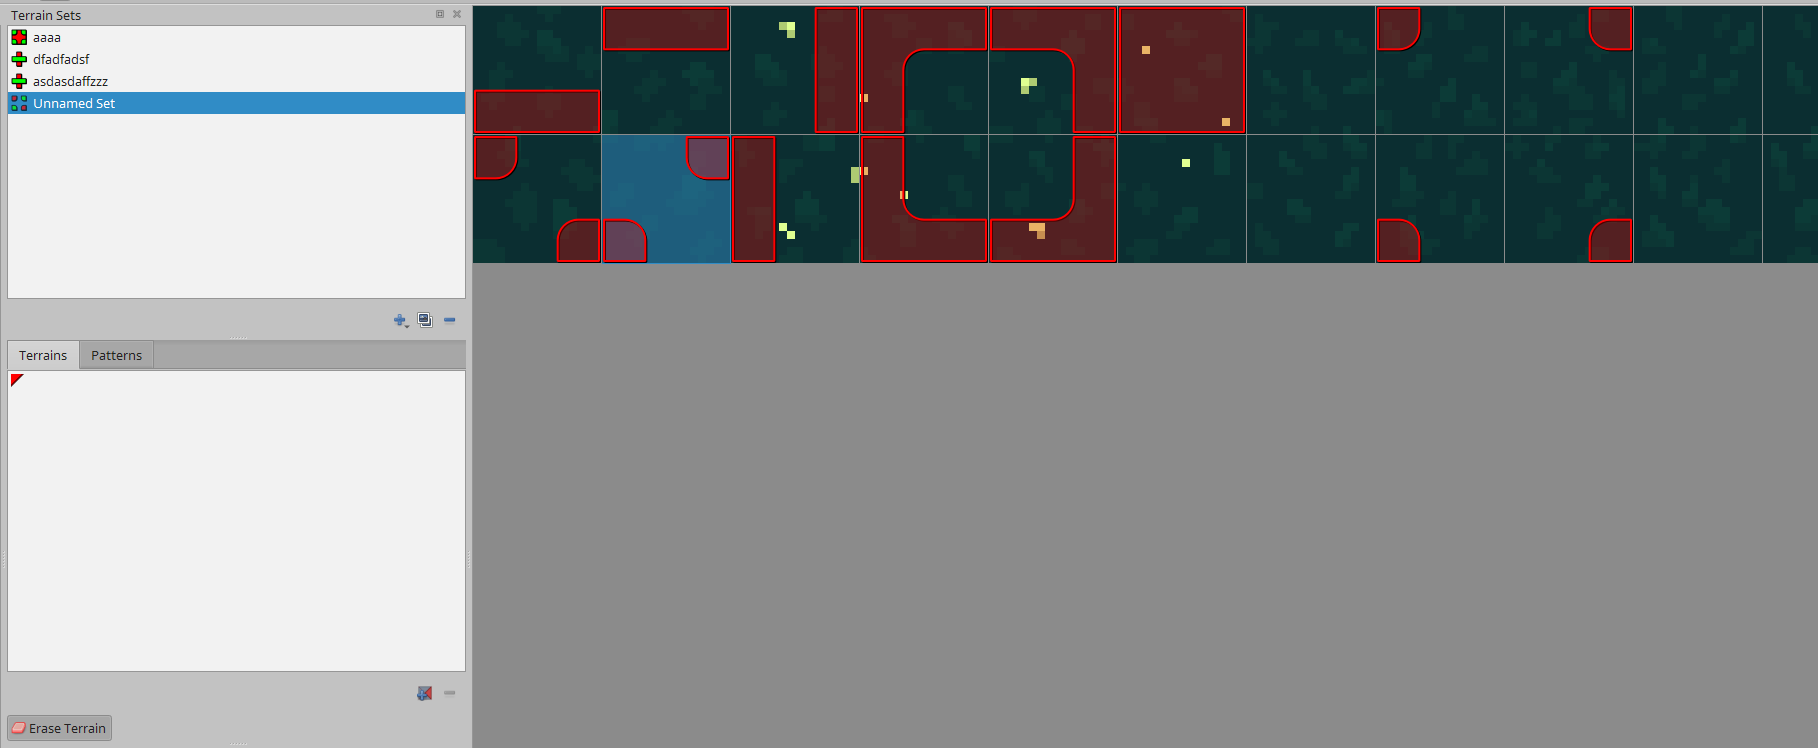
Terrains
-
Terrains .
-
It’s a kind of autotile.
-
 .
.
-
In blue is the brush shown when hovering over certain regions.
-
-
 .
.
-
Impressions :
-
I got the impression this tool is very limited and absurdly poorly made.
-
Old terrains are not updated.
-
There’s no control or intuition of the brush.
-
It’s not a 1x1 brush, but a weird blob.
-
-
The interface is very bad and confusing.
-
I still don’t understand what “Patterns” is supposed to be.
-
-
Godot
-
Yati .
-
GDScript or C#.
-
-
-
2 years without updates.
-
-
Direct export to .tscn :
-
Doesn’t need addons or anything; it simply generates a Godot 4 scene.
-
(2025-03-07) Very bad, though simple.
-
Uses deprecated Tilemap.
-
Only creates the tilemap, without any entity metadata or scripts; pretty chill, but not useful.
-